> ## Documentation Index
> Fetch the complete documentation index at: https://docs.browserbase.com/llms.txt
> Use this file to discover all available pages before exploring further.
# Deploy from playground
> Create, test, and deploy browser agent Functions directly from the Browserbase dashboard
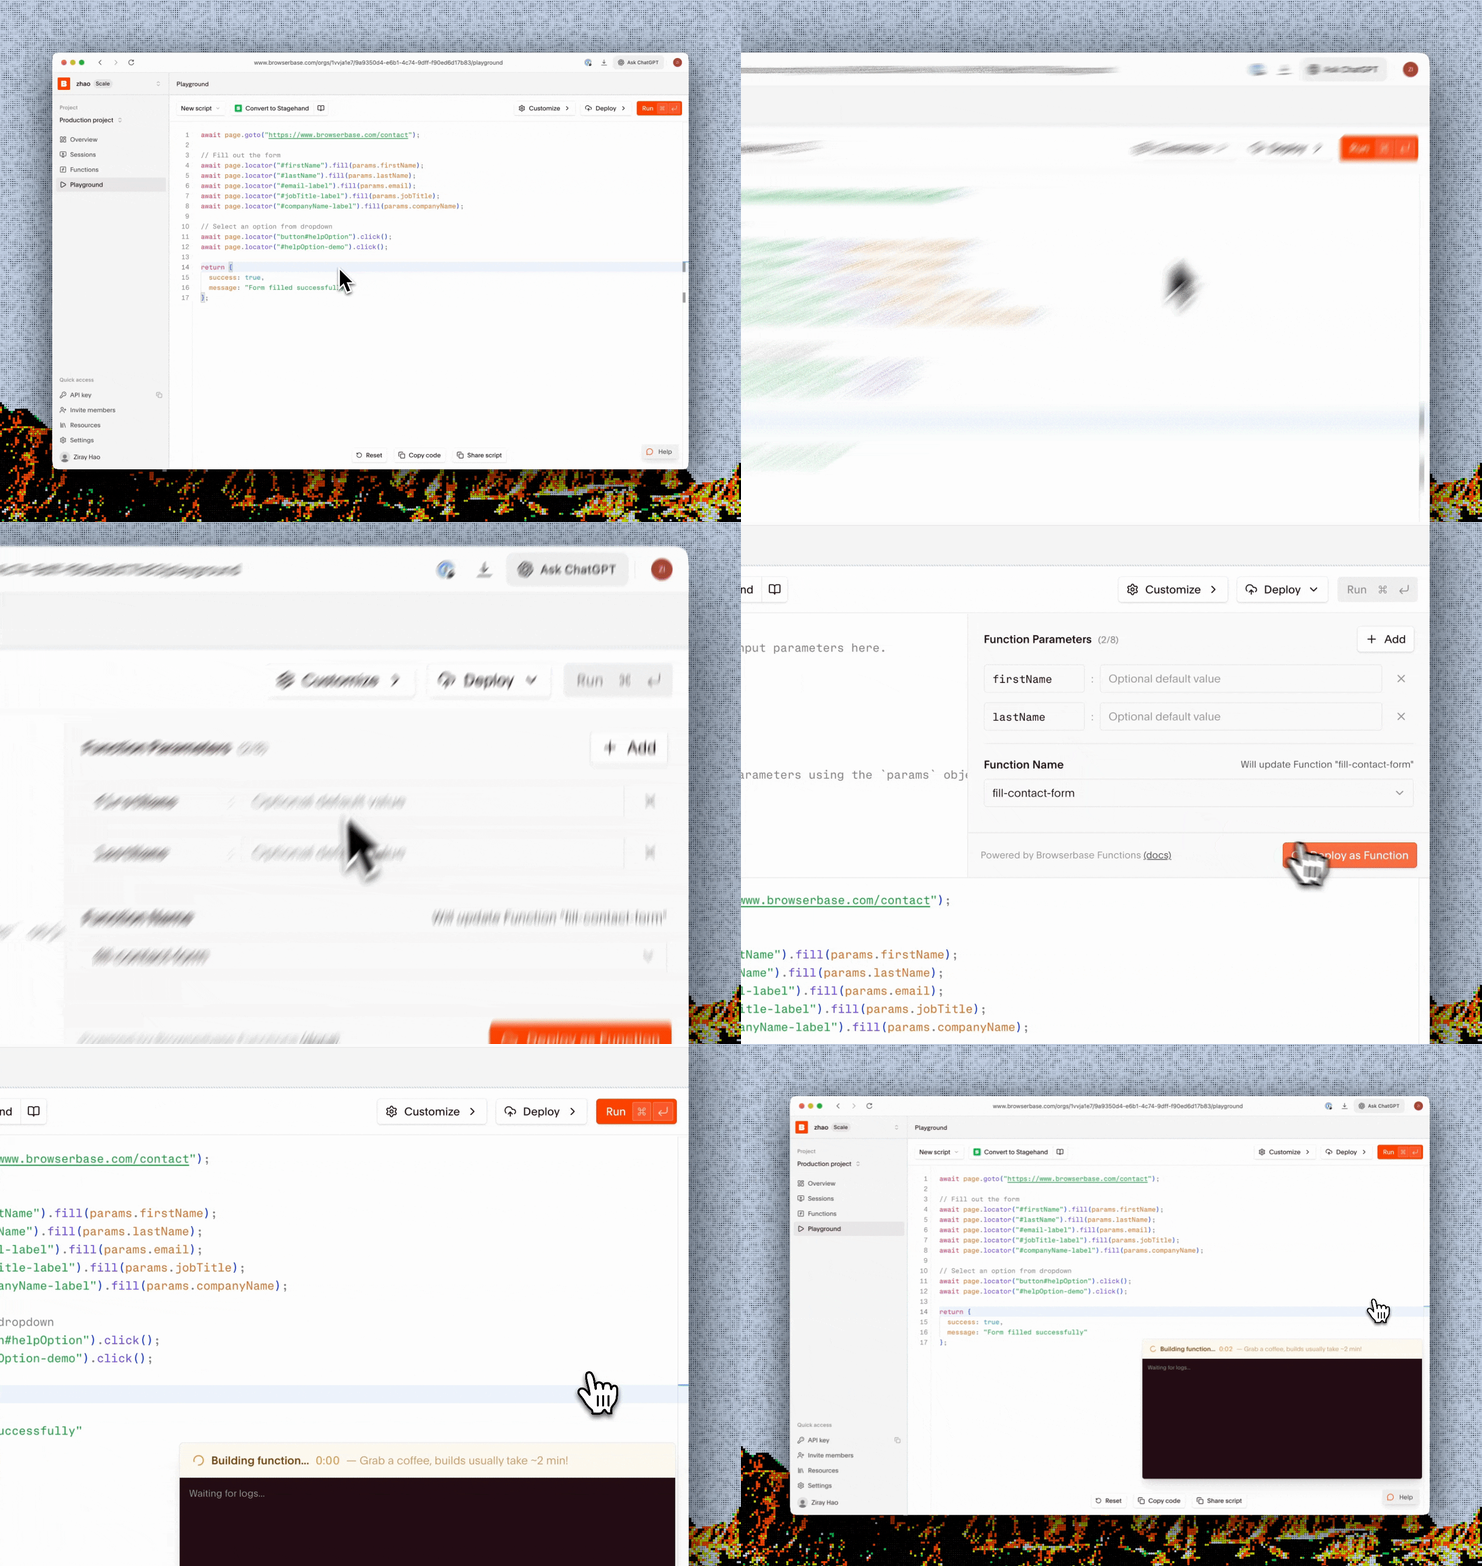
The Browserbase Playground provides a visual interface for creating and deploying Functions without needing to set up a local development environment. Write your Stagehand automation script directly in the browser, test it with the **Run** button, and deploy as a function with a single click.
 ## Why use the playground?
* **No local setup** - Start writing Functions immediately without installing any tools
* **Instant feedback** - Test your automation and see results in real-time
* **Built-in editor** - Full-featured code editor with Stagehand support
* **Function parameters** - Define input parameters with optional default values
* **One-click deploy** - Publish your Function directly to Browserbase infrastructure
* **Live session view** - Watch your automation run in a live browser view
## Creating and deploying a Function
Functions are currently only available in the **us-west-2** region.
Navigate to the [Browserbase Dashboard](https://www.browserbase.com/overview) and click on **Playground** in the navigation bar.
The Playground editor comes pre-loaded with a Stagehand template. Write your automation logic using Stagehand:
```typescript theme={null}
const stagehand = new Stagehand(config);
await stagehand.init();
const page = stagehand.context.pages()[0];
console.log('Initialized Stagehand');
await page.goto("https://news.ycombinator.com");
console.log('Navigated to page');
await stagehand.act(`Search for "${params.searchQuery}"`);
console.log('Searched');
const articles = await stagehand.extract({
instruction: "Extract article titles and URLs",
schema: z.object({
articles: z.array(z.object({
title: z.string(),
url: z.string(),
})),
}),
});
return articles;
```
The Playground automatically provides Stagehand configuration and initialization. You can also use the **Convert to Stagehand** button to convert plain Playwright scripts.
Use the **Function Parameters** panel on the right side to define inputs for your Function. Click **+ Add** to create parameters:
## Why use the playground?
* **No local setup** - Start writing Functions immediately without installing any tools
* **Instant feedback** - Test your automation and see results in real-time
* **Built-in editor** - Full-featured code editor with Stagehand support
* **Function parameters** - Define input parameters with optional default values
* **One-click deploy** - Publish your Function directly to Browserbase infrastructure
* **Live session view** - Watch your automation run in a live browser view
## Creating and deploying a Function
Functions are currently only available in the **us-west-2** region.
Navigate to the [Browserbase Dashboard](https://www.browserbase.com/overview) and click on **Playground** in the navigation bar.
The Playground editor comes pre-loaded with a Stagehand template. Write your automation logic using Stagehand:
```typescript theme={null}
const stagehand = new Stagehand(config);
await stagehand.init();
const page = stagehand.context.pages()[0];
console.log('Initialized Stagehand');
await page.goto("https://news.ycombinator.com");
console.log('Navigated to page');
await stagehand.act(`Search for "${params.searchQuery}"`);
console.log('Searched');
const articles = await stagehand.extract({
instruction: "Extract article titles and URLs",
schema: z.object({
articles: z.array(z.object({
title: z.string(),
url: z.string(),
})),
}),
});
return articles;
```
The Playground automatically provides Stagehand configuration and initialization. You can also use the **Convert to Stagehand** button to convert plain Playwright scripts.
Use the **Function Parameters** panel on the right side to define inputs for your Function. Click **+ Add** to create parameters:
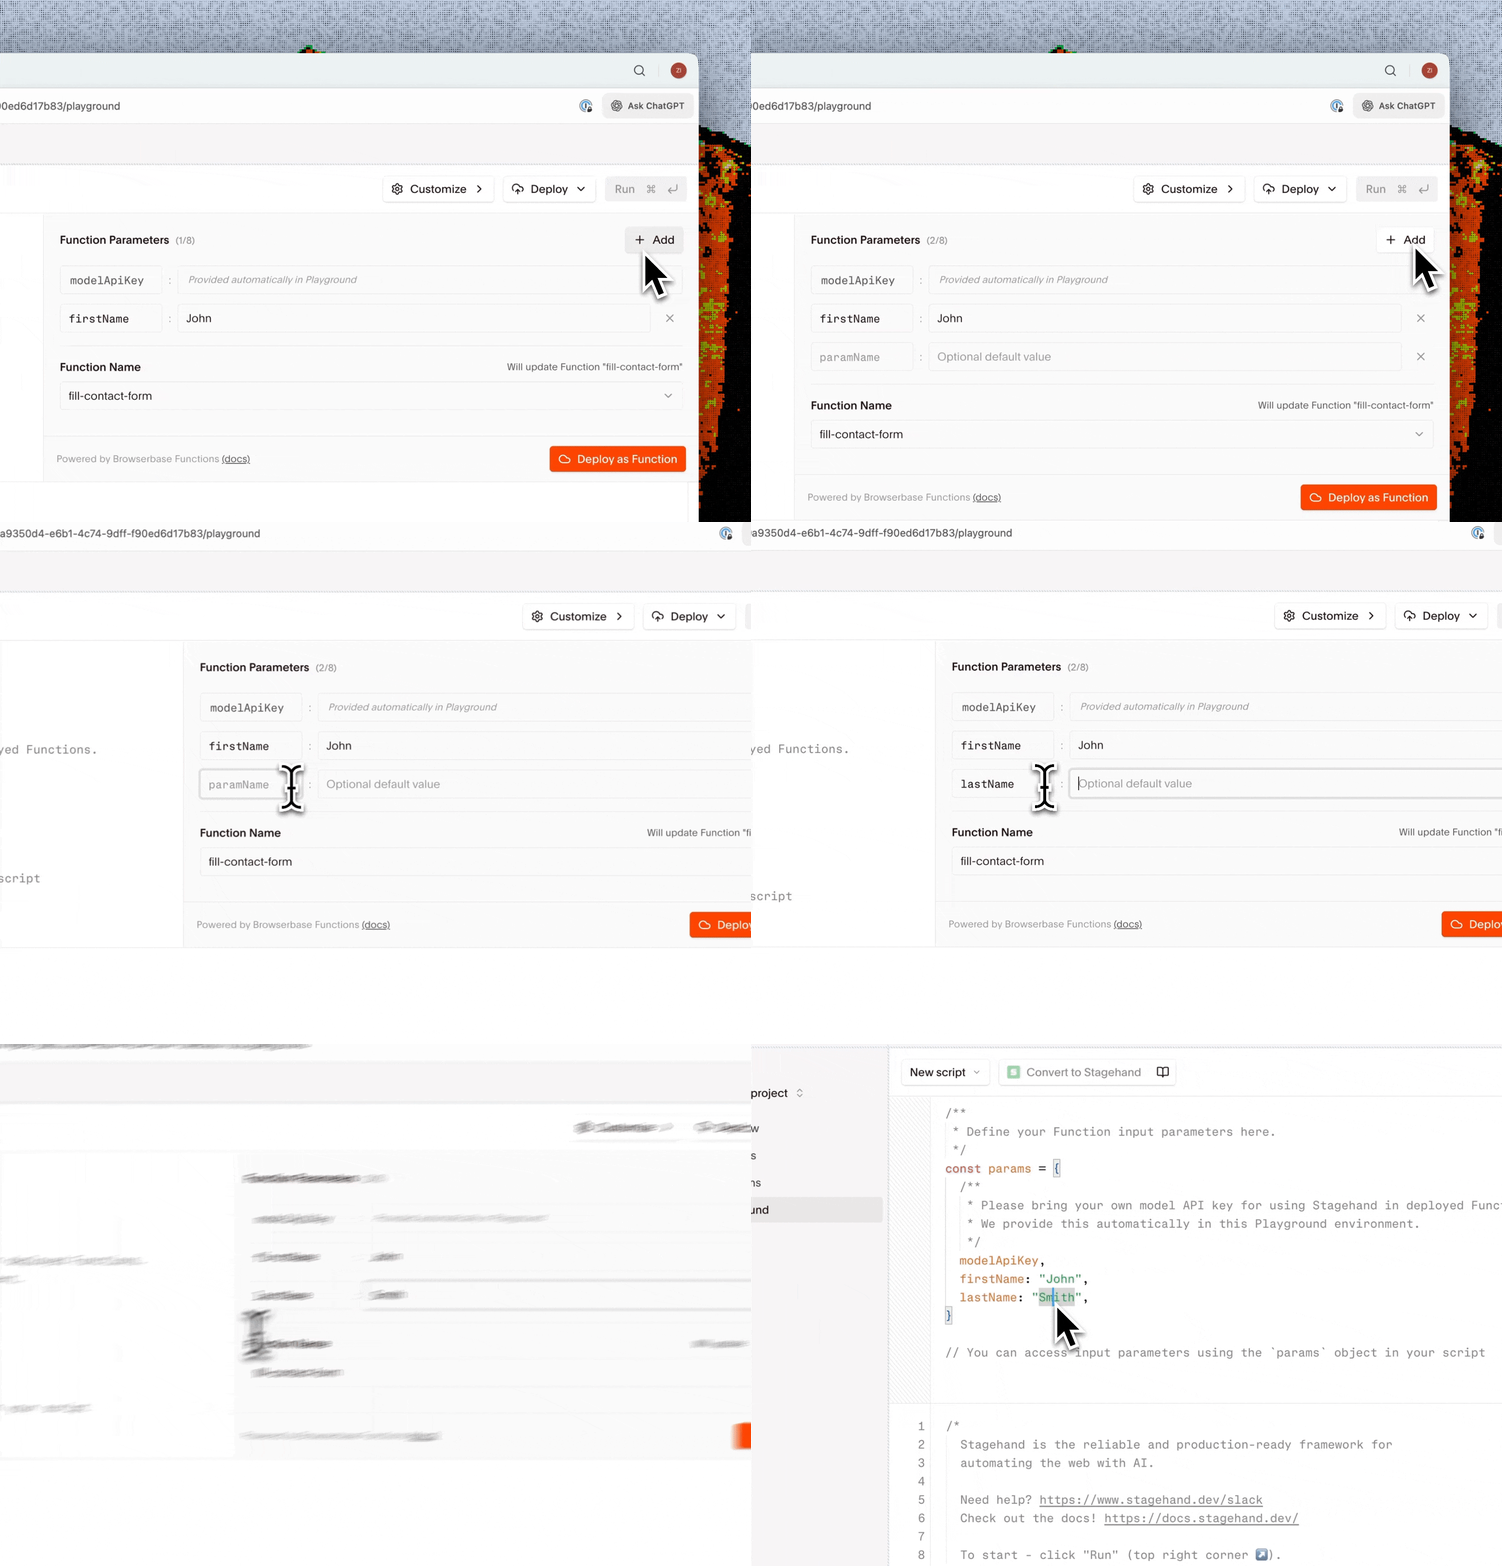 * **Parameter name** - The key used to access the value (e.g., `searchQuery`)
* **Default value** - Optional fallback value if not provided at invocation
Access parameters in your script using the `params` object:
```typescript theme={null}
await stagehand.act(`Search for "${params.searchQuery}"`);
```
You can define up to 8 Function parameters. Some parameters like `modelApiKey` are provided automatically in the Playground environment.
Click the **Run** button to test your script. The Playground will:
1. Create a new browser session
2. Execute your automation code
3. Display console output and results
4. Show a live view of the browser session
Use the live view to debug and verify your automation is working correctly before deploying.
Once you're satisfied with your script:
1. Set the **Function Name** in the panel on the right (e.g., `search-hacker-news`)
2. Click **Deploy** in the toolbar, then select **Deploy as Function**
3.
* **Parameter name** - The key used to access the value (e.g., `searchQuery`)
* **Default value** - Optional fallback value if not provided at invocation
Access parameters in your script using the `params` object:
```typescript theme={null}
await stagehand.act(`Search for "${params.searchQuery}"`);
```
You can define up to 8 Function parameters. Some parameters like `modelApiKey` are provided automatically in the Playground environment.
Click the **Run** button to test your script. The Playground will:
1. Create a new browser session
2. Execute your automation code
3. Display console output and results
4. Show a live view of the browser session
Use the live view to debug and verify your automation is working correctly before deploying.
Once you're satisfied with your script:
1. Set the **Function Name** in the panel on the right (e.g., `search-hacker-news`)
2. Click **Deploy** in the toolbar, then select **Deploy as Function**
3.
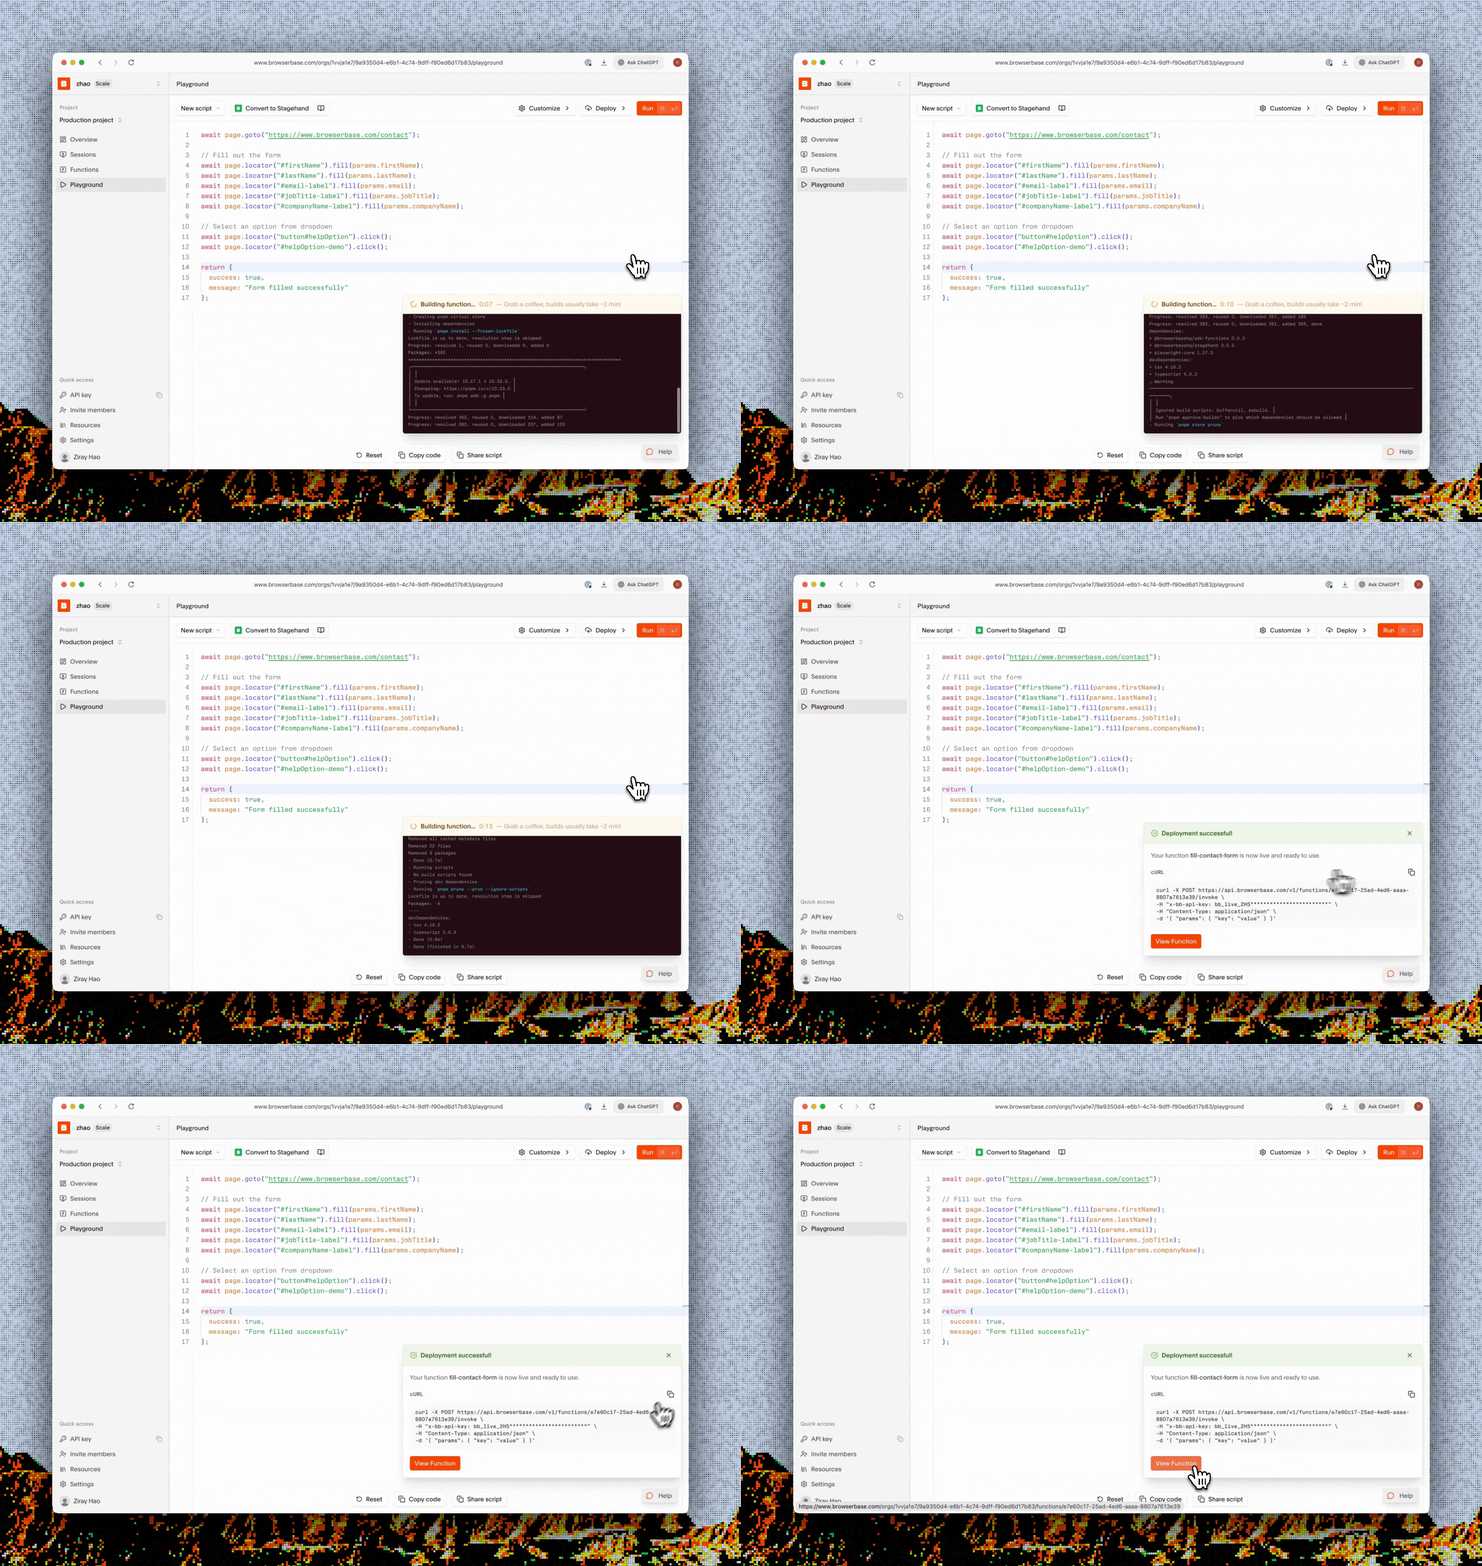 After a successful deployment, a modal will appear with:
* Confirmation that your Function is live
* A ready-to-use **cURL command** for invoking your Function
* A **View Function** button to see your Function in the Functions dashboard
## Managing deployed Functions
Click **View Function** in the deployment modal or navigate to the **Functions** tab to see your deployed Functions. From here you can:
* View Function details and invocation history
* See previous versions of your Function
* Copy the invoke URL and cURL commands
* Delete Functions you no longer need
Redeploying from the Playground with the same Function name will create a new version of the existing Function.
## Transitioning to local development
As your Functions grow more complex, you may want to transition to local development for better tooling and version control. See the [Functions documentation](/platform/runtime/overview) for setup instructions.
## Next steps
Set up a local development environment for advanced Function development
Learn more about the Functions API and configuration options
After a successful deployment, a modal will appear with:
* Confirmation that your Function is live
* A ready-to-use **cURL command** for invoking your Function
* A **View Function** button to see your Function in the Functions dashboard
## Managing deployed Functions
Click **View Function** in the deployment modal or navigate to the **Functions** tab to see your deployed Functions. From here you can:
* View Function details and invocation history
* See previous versions of your Function
* Copy the invoke URL and cURL commands
* Delete Functions you no longer need
Redeploying from the Playground with the same Function name will create a new version of the existing Function.
## Transitioning to local development
As your Functions grow more complex, you may want to transition to local development for better tooling and version control. See the [Functions documentation](/platform/runtime/overview) for setup instructions.
## Next steps
Set up a local development environment for advanced Function development
Learn more about the Functions API and configuration options